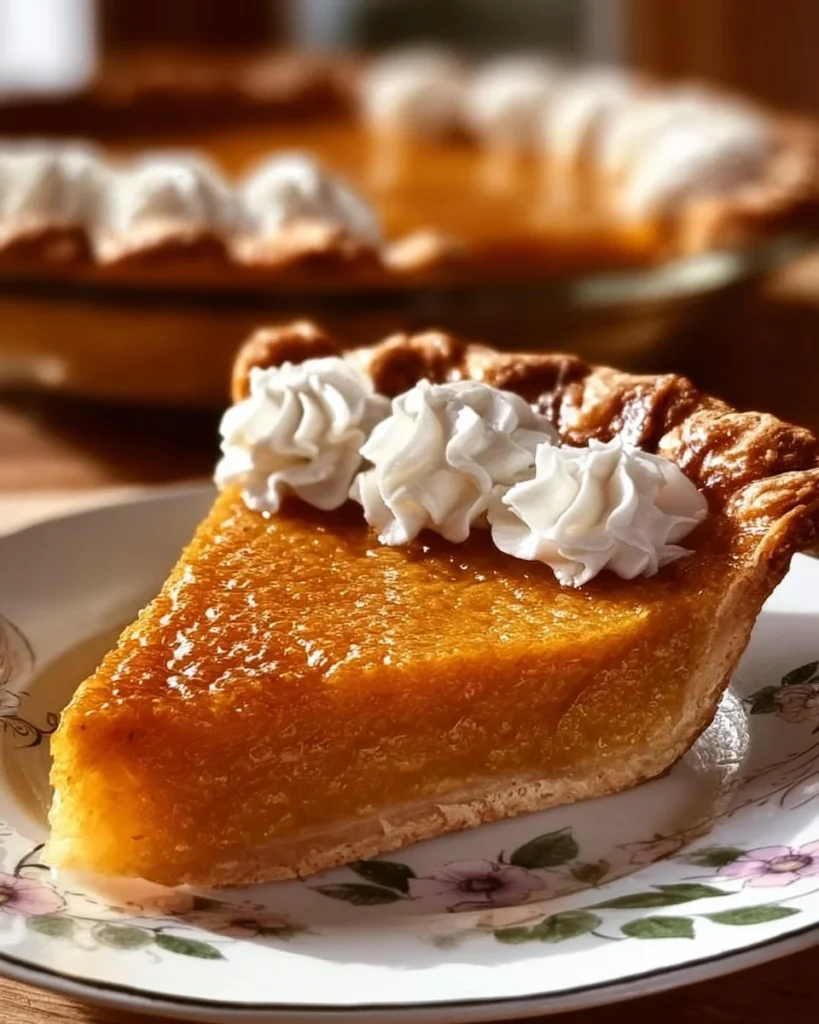
Buttermilk Sweet Potato Pie is a delicious dessert that combines the creamy texture of sweet potatoes with the tanginess of buttermilk. This pie is perfect for any occasion, whether it’s a family gathering, a holiday feast, or just a sweet treat for yourself. Its warm spices and subtle sweetness make it a comforting choice that everyone will enjoy.
Why Make This Recipe
Making Buttermilk Sweet Potato Pie is a great way to showcase the natural sweetness of sweet potatoes. It’s an easy recipe that doesn’t require any special skills, and it can be prepared in just a few simple steps. Plus, it’s a fantastic dessert that brings a taste of home and warmth to your table. This pie is not only easy to make but also a crowd-pleaser, making it an ideal choice for gatherings.
How to Make Buttermilk Sweet Potato Pie
Ingredients:
- 1 pre-made pie crust
- 2 cups mashed sweet potatoes
- 1 cup buttermilk
- 3/4 cup sugar
- 1/2 cup brown sugar
- 3 large eggs
- 1 teaspoon vanilla extract
- 1 teaspoon ground cinnamon
- 1/2 teaspoon ground nutmeg
- 1/4 teaspoon salt
Directions:
- Preheat the oven to 350°F (175°C).
- In a large bowl, combine the mashed sweet potatoes, buttermilk, sugar, brown sugar, eggs, vanilla extract, cinnamon, nutmeg, and salt. Mix until smooth.
- Pour the sweet potato mixture into the pre-made pie crust.
- Bake in the preheated oven for 50-60 minutes, or until a toothpick inserted in the center comes out clean.
- Allow to cool before serving.
How to Serve Buttermilk Sweet Potato Pie
To serve Buttermilk Sweet Potato Pie, slice it into wedges and enjoy it warm or at room temperature. It pairs wonderfully with a dollop of whipped cream or a scoop of vanilla ice cream. You can also sprinkle some cinnamon on top for a festive touch.
How to Store Buttermilk Sweet Potato Pie
To store your Buttermilk Sweet Potato Pie, cover it with plastic wrap or aluminum foil and place it in the refrigerator. It will stay fresh for about 3-4 days. If you want to keep it longer, you can freeze the pie. Make sure to wrap it tightly and use it within 2-3 months for the best flavor.
Tips to Make Buttermilk Sweet Potato Pie
- For a smoother filling, ensure that the sweet potatoes are well-mashed and free of lumps.
- You can substitute the buttermilk with regular milk for a less tangy flavor.
- Add a pinch of ginger or allspice for an extra layer of flavor if desired.
Variation
For a twist on the classic recipe, consider adding chocolate chips or pecans to the filling. These additions can elevate the pie and give it a unique taste.
FAQs
1. Can I use fresh sweet potatoes instead of canned?
Yes, you can use fresh sweet potatoes! Simply boil or roast them until soft, then mash them before using in the recipe.
2. Is it okay to make the pie ahead of time?
Absolutely! You can make Buttermilk Sweet Potato Pie a day or two in advance; just remember to store it in the refrigerator.
3. What should I do if my pie crust is browning too much?
If you notice the pie crust browning too quickly, you can cover the edges with aluminum foil to prevent burning while the filling bakes.
Enjoy making your Buttermilk Sweet Potato Pie!

Buttermilk Sweet Potato Pie
Ingredients
Pie Crust
- 1 whole pre-made pie crust Use your favorite store-bought or homemade pie crust.
Filling
- 2 cups mashed sweet potatoes Freshly boiled or roasted for best flavor.
- 1 cup buttermilk Can substitute with regular milk for a less tangy flavor.
- ¾ cup sugar Granulated sugar.
- ½ cup brown sugar Packed brown sugar.
- 3 large eggs Large eggs to bind the filling.
- 1 teaspoon vanilla extract Pure vanilla extract recommended.
- 1 teaspoon ground cinnamon Add extra for more flavor if desired.
- ½ teaspoon ground nutmeg
- ¼ teaspoon salt
Instructions
Preparation
- Preheat the oven to 350°F (175°C).
- In a large bowl, combine the mashed sweet potatoes, buttermilk, sugar, brown sugar, eggs, vanilla extract, cinnamon, nutmeg, and salt. Mix until smooth.
- Pour the sweet potato mixture into the pre-made pie crust.
Baking
- Bake in the preheated oven for 50-60 minutes, or until a toothpick inserted in the center comes out clean.
- Allow to cool before serving.