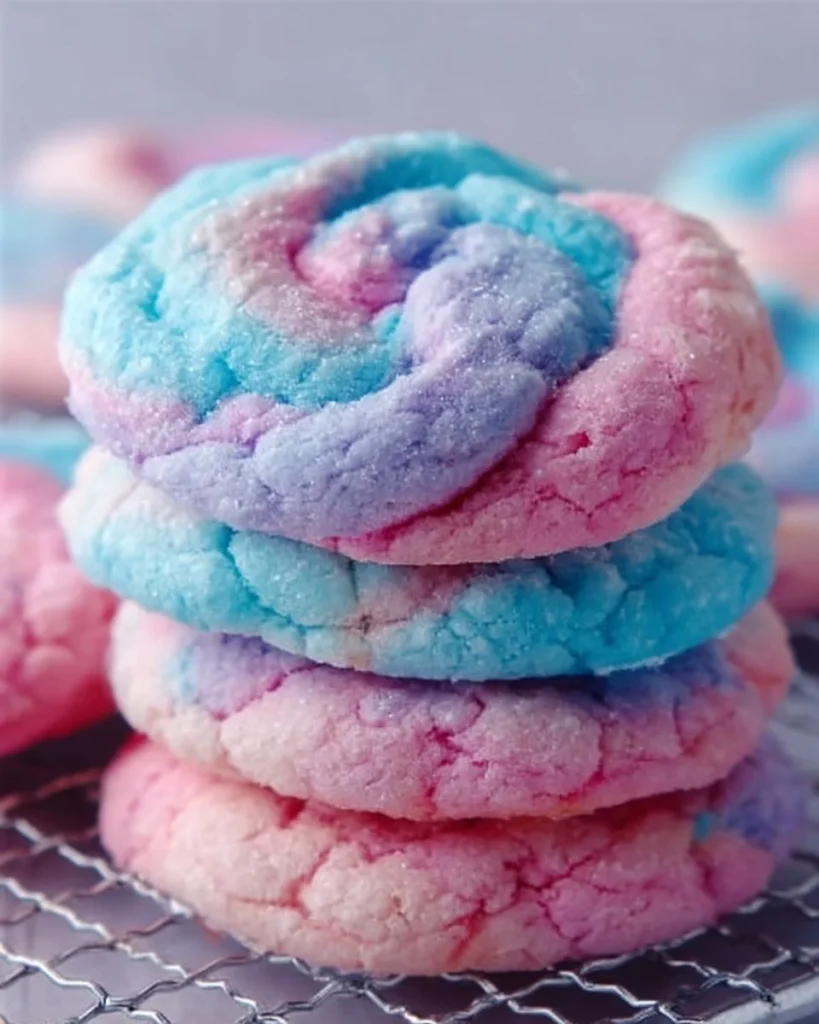
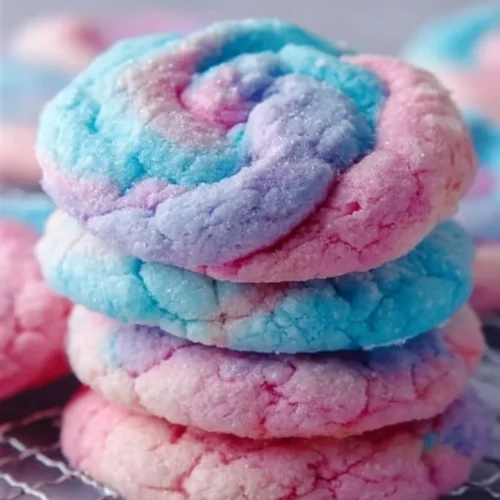
If you have a sweet tooth and love colorful treats, then Cotton Candy Cookies are the perfect choice for you! These delightful cookies are not just eye-catching but also packed with sweetness and a hint of nostalgia. With their soft texture and pastel colors, they are bound to brighten up any occasion.
Why Make This Recipe
Cotton Candy Cookies are a fun twist on traditional cookies. They combine the joy of classic cookie recipes with the whimsical flavors and colors associated with cotton candy. Whether you’re hosting a party, celebrating a birthday, or simply want to treat yourself, these cookies will catch everyone’s attention and taste buds. Plus, making them is a fun activity you can do with family and friends!
How to Make Cotton Candy Cookies
Creating these tasty treats is easier than you might think! Just follow the steps below and get ready to enjoy a batch of colorful goodness.
Ingredients:
- 2 1/2 cups all-purpose flour
- 1 cup granulated sugar
- 1/2 teaspoon baking powder
- 1/4 teaspoon baking soda
- 1/4 teaspoon salt
- 1/2 cup unsalted butter (softened)
- 1/4 cup buttermilk (you can substitute with 1/4 cup milk mixed with 1 teaspoon lemon juice or vinegar if you don’t have buttermilk)
- 1 large egg
- 1 teaspoon vanilla extract
- Gel food coloring (pink and blue)
- Cotton candy flavoring (optional, for an added burst of that nostalgic cotton candy flavor)
Directions:
Step 1: Preheat the Oven
Preheat your oven to 350°F (175°C). This ensures that your cookies bake evenly.
Step 2: Mix the Dry Ingredients
In a bowl, whisk together the flour, baking powder, baking soda, and salt. This helps to combine the dry ingredients evenly.
Step 3: Cream Butter and Sugar
In another bowl, beat the softened butter and sugar together until creamy. This adds air and makes your cookies fluffy!
Step 4: Add the Wet Ingredients
Beat in the egg, buttermilk, and vanilla extract into the butter mixture. Mix until everything is combined well.
Step 5: Combine Dry and Wet Ingredients
Gradually add the dry ingredients to the wet mixture. Stir until there are no more flour streaks. Be careful not to over-mix!
Step 6: Divide and Color the Dough
Divide the dough into two equal parts. Add pink food coloring to one half and blue food coloring to the other half. Knead the dough a bit to blend the colors.
Step 7: Form the Cotton Candy Cookies
Scoop out small balls of each colored dough and twist them together gently to form a marbled effect. Place them on a baking sheet lined with parchment paper.
Step 8: Bake
Bake in the preheated oven for 10-12 minutes, or until the edges are lightly golden.
Step 9: Cool and Serve
Remove from the oven and let the cookies cool on the baking sheet for a few minutes before transferring them to a wire rack to cool completely.
How to Serve Cotton Candy Cookies
These cookies are best served fresh, but they can also be enjoyed at room temperature. For an extra treat, serve them with a glass of milk or a scoop of vanilla ice cream. You can also sprinkle some extra cotton candy flavoring on top for a special touch!
How to Store Cotton Candy Cookies
To keep your cookies fresh, store them in an airtight container at room temperature. They will stay delicious for up to a week. If you want them to last longer, consider freezing them. Just make sure to place parchment paper between layers of cookies before sealing them in a freezer bag.
Tips to Make Cotton Candy Cookies
- Make sure your butter is softened to room temperature for easy mixing.
- Use gel food coloring for brighter colors that won’t change the texture of the cookies.
- Experiment with different flavors by adding other extracts, like almond or strawberry, for a fun twist!
Variation
You can add sprinkles to the dough for extra fun and color. Rolling the cookie balls in sprinkles before baking also adds a delightful crunch.
FAQs
Q: Can I use regular milk instead of buttermilk?
A: Yes! You can mix 1/4 cup of milk with 1 teaspoon of lemon juice or vinegar as a substitute for buttermilk.
Q: How can I make the cookies more flavorful?
A: You can add cotton candy flavoring to the dough for an extra burst of sweetness and nostalgia.
Q: Can I store the cookie dough before baking?
A: Yes! You can refrigerate the cookie dough for up to 3 days. Just make sure to wrap it tightly in plastic wrap.
Enjoy making and sharing these Cotton Candy Cookies—perfect for any celebration or just a fun baking day at home!
Cotton Candy Cookies
Ingredients
Dry Ingredients
- 2.5 cups all-purpose flour
- 0.5 teaspoon baking powder
- 0.25 teaspoon baking soda
- 0.25 teaspoon salt
Wet Ingredients
- 1 cup granulated sugar
- 0.5 cup unsalted butter (softened) Make sure it’s at room temperature.
- 0.25 cup buttermilk Substitute with 1/4 cup milk mixed with 1 teaspoon lemon juice or vinegar.
- 1 large egg
- 1 teaspoon vanilla extract
- Gel food coloring (pink and blue) For coloring the dough.
- Cotton candy flavoring (optional) For an added burst of flavor.
Instructions
Preparation
- Preheat your oven to 350°F (175°C) for even baking.
- In a bowl, whisk together the flour, baking powder, baking soda, and salt.
- In another bowl, beat the softened butter and sugar together until creamy.
- Beat in the egg, buttermilk, and vanilla extract into the butter mixture until well combined.
- Gradually add the dry ingredients to the wet mixture and stir until there are no flour streaks.
- Divide the dough into two equal parts. Add pink food coloring to one half and blue food coloring to the other half, kneading to blend.
Baking
- Scoop out small balls of each colored dough, twist them together to create a marbled effect, and place on a parchment-lined baking sheet.
- Bake for 10-12 minutes or until edges are lightly golden.
- Allow cookies to cool on the baking sheet for a few minutes before transferring to a wire rack.