The smell of fresh bread in your home is comforting. It brings back memories of warmth and joy. Imagine making this magic with just four simple ingredients.
This bread is incredibly easy to make. It’s perfect for both seasoned bakers and beginners. You’ll feel proud pulling a crusty loaf from your oven. It’s like having a bakery in your home.
Let’s start this fun journey together! You’ll learn to make delicious bread with just a few ingredients.
Key Takeaways
- Baking artisan bread at home can be quick and simple.
- Four ingredients are all you need for a delicious loaf.
- The process requires minimal time and effort.
- Even beginners can master this easy bread recipe.
- Enjoy the delightful aroma of bread filling your kitchen.
- Serve your bread warm with your favorite toppings.
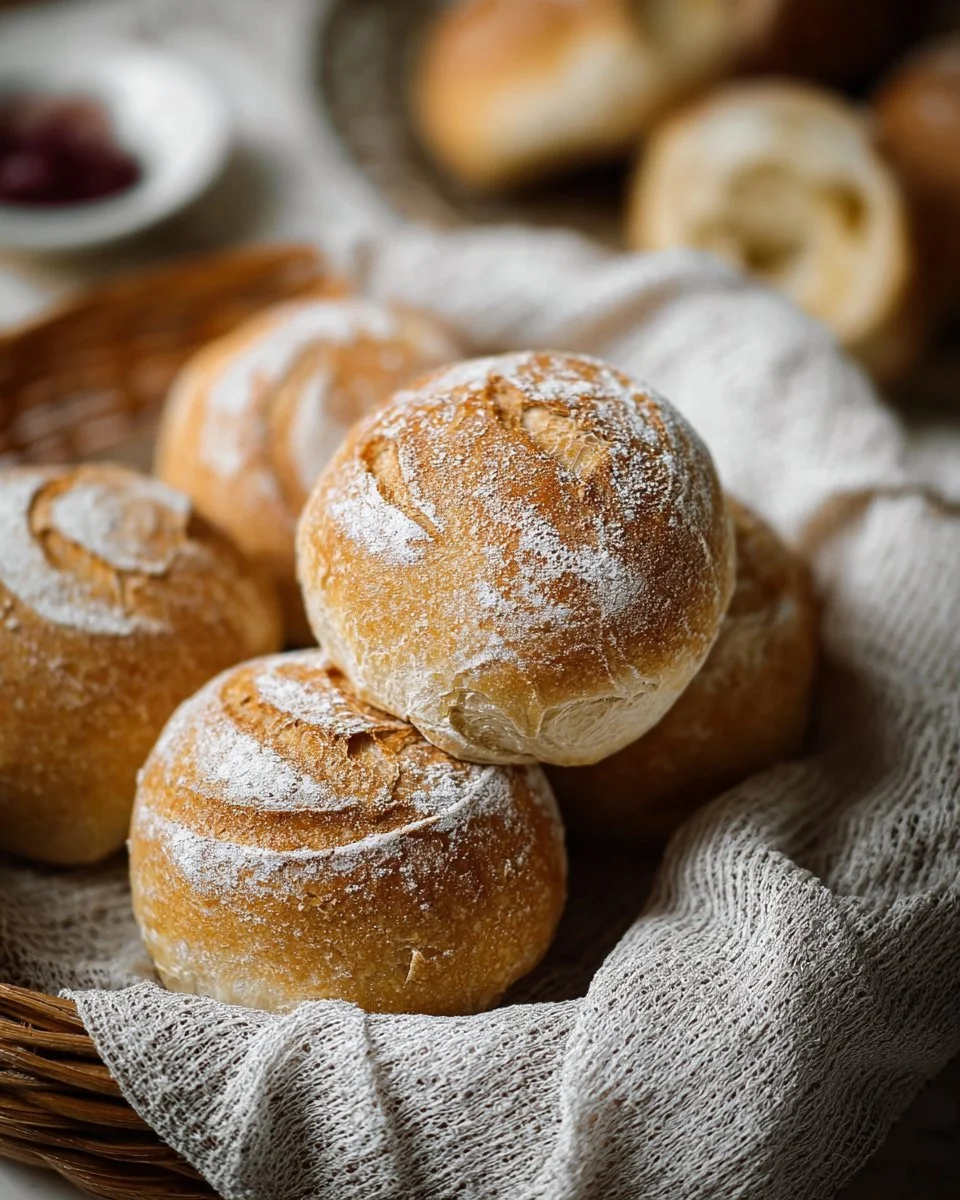
Introduction to Artisan Bread
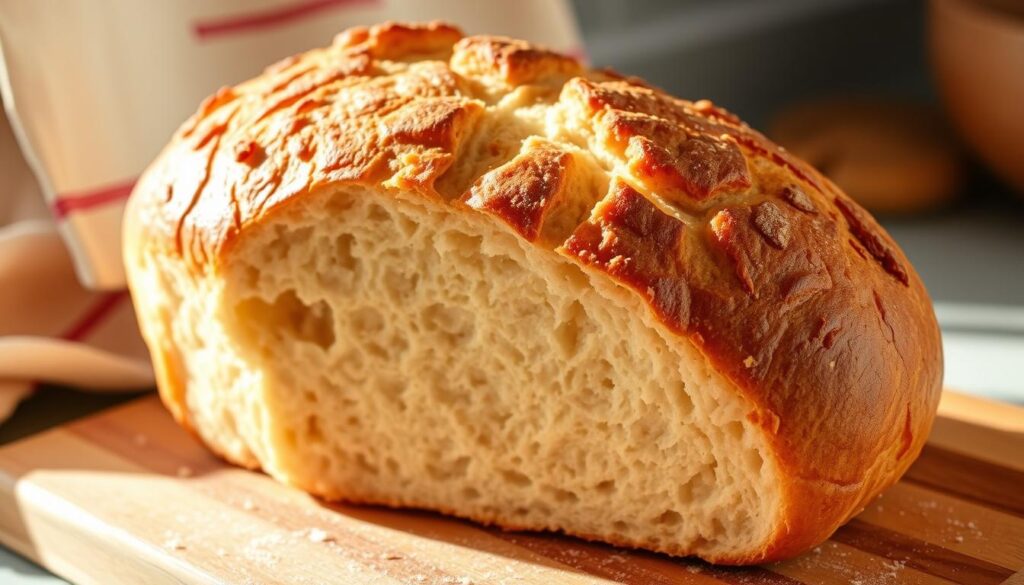
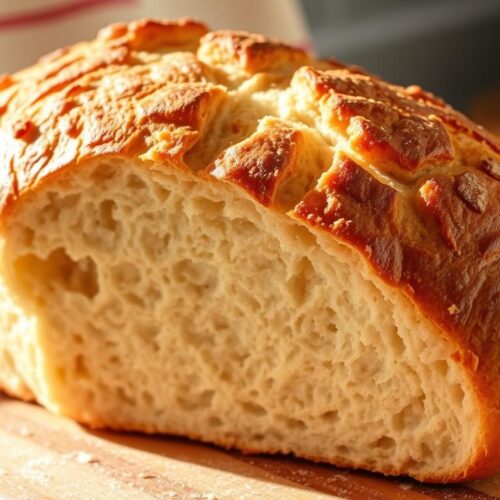
Artisan bread is loved for its crunchy outside and soft inside. It’s not just tasty but also made with care. The process is simple, making it easy for home bakers to try.
Don’t worry if you think making bread is hard. You don’t need fancy tools or skills. Just a few ingredients and some patience. Many have turned their kitchens into bakeries, making bread that’s as good as store-bought.

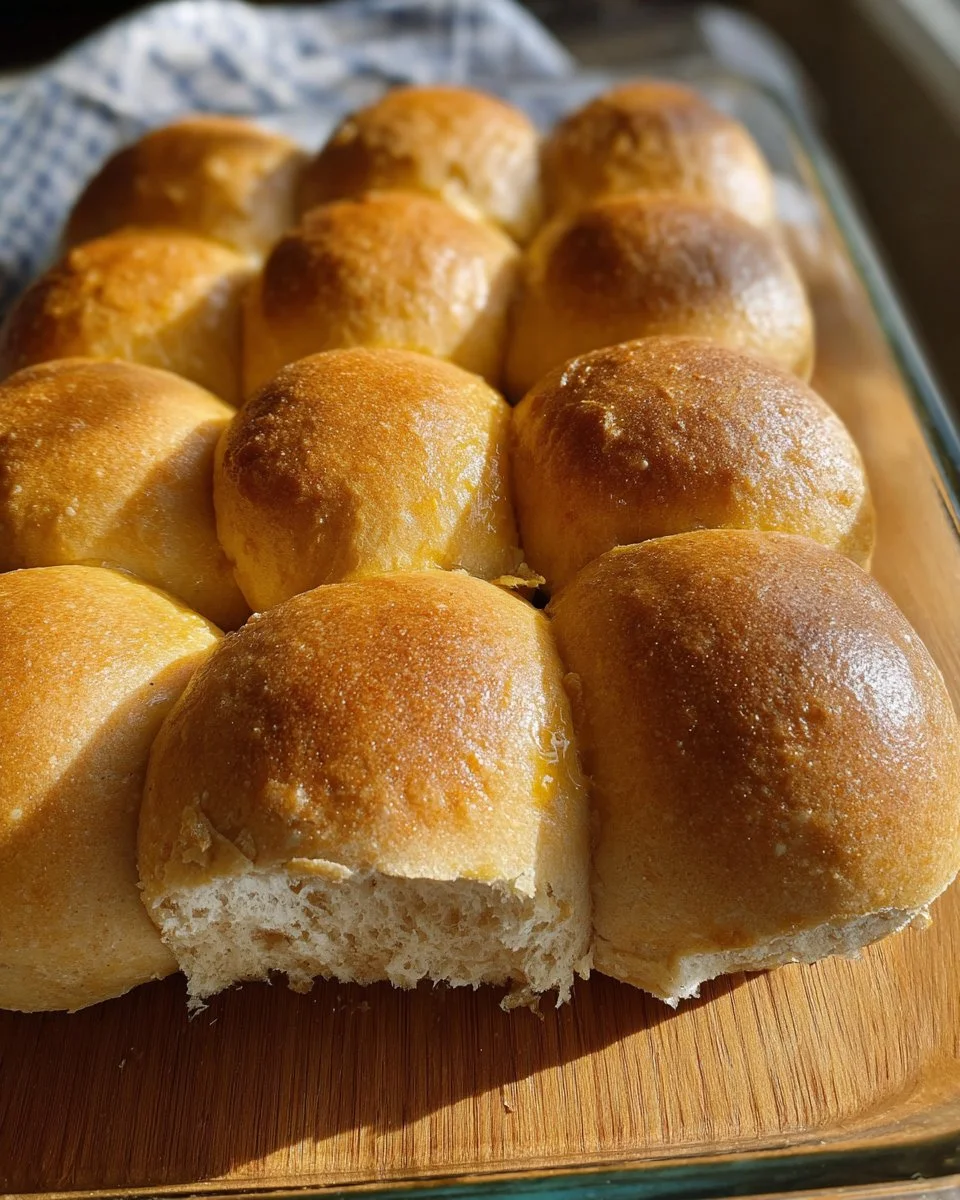
The Easiest Bread Recipe Ever
Baking bread at home is simple. This recipe shows how easy it can be. With just four ingredients, you can make a tasty loaf without hassle.
Four Simple Ingredients
This homemade bread is easy because it only needs a few things. You’ll need all-purpose flour, salt, yeast, and warm water. Each ingredient adds to the bread’s taste and texture. This makes baking fun and stress-free.
Why No Kneading is Required
This recipe doesn’t need kneading. The dough rises for a long time, which makes it work for you. This method improves the bread’s taste and texture. With just a few minutes of effort, you get a delicious loaf.

The Ingredients You’ll Need
Exploring artisan bread means knowing each ingredient well. The right mix makes a tasty loaf. Let’s look at these key parts.
All Purpose Flour: The Base
All-purpose flour is your bread’s base. It gives the dough the gluten it needs to rise and get chewy. This flour is great for simple bread recipes. Make sure to measure it right for the best dough.
The Role of Warm Water
Warm water is key for yeast activation, making your bread rise. The water should be warm, not hot, to keep the yeast alive. Mixing it with other ingredients creates a perfect dough for baking.
Choosing the Right Yeast
Active dry yeast is a top choice for bread. It grows well in warm water, adding texture and flavor. Always follow the package for the best activation.
Why Salt Matters
Salt boosts your bread’s taste and strengthens gluten. It balances sweetness and adds to the flavor. Don’t forget it, as it’s vital for a tasty loaf.
| Ingredient | Function | Notes |
|---|---|---|
| All-Purpose Flour | Base structure | Provides gluten for texture |
| Warm Water | Activates yeast | Temperature should be around 110°F |
| Yeast (Active Dry) | Leavening agent | Ensure proper activation before mixing |
| Salt | Flavor enhancer | Important for overall taste and gluten strength |
Step-by-Step Instructions to Make Artisan Bread
Making artisan bread starts with knowing the key steps. This guide will help you through each part. It makes making homemade bread easy and fun.
Mixing the Ingredients
Begin by mixing flour, salt, yeast, and warm water in a big bowl. Use a wooden spoon or your hands to mix until it’s a shaggy dough. Make sure to mix well, but don’t overdo it. This helps keep the dough soft.
Letting the Dough Rise
After mixing, cover the bowl with plastic wrap or a towel. Let the dough rise for at least 12 hours at room temperature. This step makes the bread taste better and feel softer. You’ll see bubbles, which means the yeast is working.
Shaping the Bread
When the dough has risen, dust your work area with flour. Carefully move the dough to the floured area. Use floured hands to shape it into a ball. Don’t press too hard. Let it rest for 30 minutes to make it easier to shape again.
| Step | Action | Benefits |
|---|---|---|
| 1 | Mix the Ingredients | Creates a cohesive dough without overworking. |
| 2 | Let Dough Rise | Develops flavor and texture through fermentation. |
| 3 | Shape Dough | Prepares the dough for a final rise and baking. |
By following these steps, you’ll enjoy making artisan bread at home. You’ll love the delicious flavors you’ll discover.
Tips for Successful Bread Baking
For great bread baking, some techniques are key. Paying close attention to flour amounts and managing rise times is important. These tips can make your homemade bread recipes easy and fun.
Correct Flour Measurement
Getting flour measurement right is critical for the dough’s consistency. A kitchen scale is the best tool for this. If you use cups, fill them by spooning flour gently, then level it off.
This careful approach leads to better bread-making results.
Managing Rise Time
Let your dough rise for the right amount of time. Warmer places make yeast work faster, while cooler ones slow it down. Watch your dough grow; it should almost double in size.
Timing can change with room temperature and humidity. So, it’s better to check your dough than just follow a clock.
How to Avoid Common Mistakes
Fixing common mistakes boosts your baking confidence. If your dough is too sticky, add flour a bit at a time while kneading. Problems with proofing can also happen.
Learn to trust your dough’s look and feel. With these tips, bread baking can be both fun and rewarding.
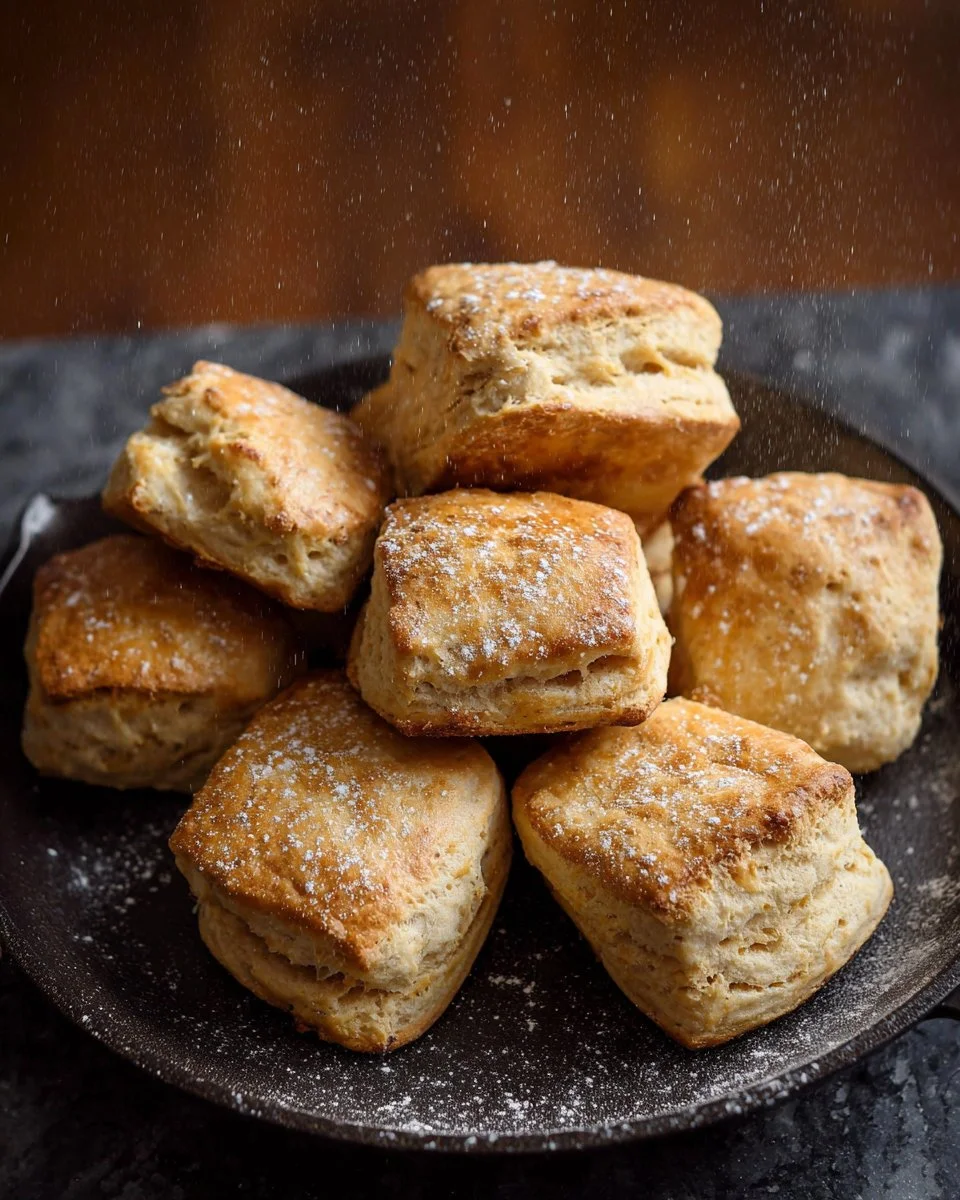
Serving and Enjoying Your Artisan Bread
When your artisan bread is perfectly baked, the fun starts. It’s great with many dishes, making meals better and opening up new tastes.
Pairing with Cozy Soups
A warm bowl of soup and fresh artisan bread is comforting. Try it with tomato basil soup or butternut squash bisque. The bread’s texture is perfect for soaking up soup flavors.
Try different soups to find your favorite pairings. It’s a great way to mix flavors and textures.
Using as Sandwich Bread
Artisan bread is also amazing for sandwiches. Its crusty outside and soft inside are a hit. Fill it with your favorite fillings for a tasty lunch.
For a vegan option, check out this article for a recipe. You can make your sandwiches simple or fancy, as you like.
Toppings and Spreads
Add toppings and spreads to make your artisan bread even better. Try butter and jam, garlic herb cheese, or avocado. You can also use homemade bread recipes with pesto or hummus for unique tastes.
Possible Variations of Artisan Bread
Exploring different types of artisan bread can make baking more fun. You can add herbs, spices, or cheese to give your bread a unique taste. Being creative in the kitchen makes your homemade bread special and flavorful.
Adding Flavorful Ingredients
Try adding ingredients to your bread dough for new flavors. Think about using:
- Fresh herbs like rosemary or thyme for a nice aroma.
- Garlic powder or onion powder for a savory taste.
- Cheese such as cheddar or parmesan for extra richness.
- Chopped olives or sun-dried tomatoes for a Mediterranean twist.
These ingredients can turn a simple loaf into a gourmet delight. It’s perfect for sharing or enjoying by yourself.
Creating Whole Wheat Artisan Bread
Whole wheat artisan bread is a healthier option that’s just as tasty. To make your bread whole wheat:
- Use half or all whole wheat flour instead of all-purpose flour.
- Add a bit more water, as whole wheat absorbs more.
- Let it rise longer for the best texture.
Trying whole wheat flour can give your bread a richer taste and more fiber. It makes your bread delicious and good for you.
With these artisan bread variations, you’ll surely wow your guests at any meal!
Why You Should Try This Recipe
Baking bread can seem hard, but this recipe makes it easy for beginners. It’s perfect for anyone who wants to bake at home. The simple steps make it fun, no matter your baking skills.
Perfect for Beginners
This recipe is great for new bakers. It uses just four ingredients and no hard techniques. You can enjoy baking without stress.
Each step is easy to follow. This helps you build confidence in the kitchen.
Time Efficiency with Minimal Hands-On Time
Time is precious, and this recipe saves it. It needs little time from you, fitting into busy lives. You can measure, mix, and shape the dough quickly.
The dough rises while you’re busy. This means you can have fresh bread without spending a lot of time.
Conclusion
Baking artisan bread at home is more than just cooking. It’s a journey that brings joy and satisfaction. With a simple recipe, you can make a delicious loaf with just a few ingredients. Your kitchen will fill with the amazing smells of homemade bread.
This easy recipe shows that making great bread is within reach. It doesn’t matter if you’re new to baking or have experience. You can make something amazing with a little patience and practice. Imagine the smiles on your family and friends’ faces when you serve them your homemade bread.
So, what are you waiting for? Start baking your own artisan bread today. Enjoy the feeling of pulling a perfectly baked loaf from the oven. Share the joy of baking with your loved ones. Happy baking!
FAQ
What makes artisan bread different from regular bread?
Artisan bread has a crusty outside and a soft, tasty inside. It needs a long time to rise, which makes it even better.
Can I make this artisan bread recipe without any special equipment?
Yes! You only need basic tools like a bowl and baking sheet. It’s easy for anyone to make, no matter their baking skills.
Is kneading necessary for this artisan bread recipe?
No kneading is needed! The dough rises for a long time. This makes it flavorful and structured without kneading.
What if my dough isn’t rising properly?
Use warm, not hot, water for the yeast. Make sure the yeast is fresh. Keep the dough in a warm, draft-free spot to help it rise.
How can I add flavor to my artisan bread?
Add herbs, spices, or other flavors to the dough. Rosemary or garlic are great choices!
Can I use whole wheat flour instead of all-purpose flour?
Yes! Whole wheat flour works well. Just remember, it absorbs more liquid, so you might need to adjust the water.
How should I store my homemade artisan bread?
Store it in a paper bag at room temperature or wrap it in plastic wrap for longer storage. Freezing slices is also a good option.
What are some great meals to serve with artisan bread?
It’s perfect with soups, for sandwiches, or with olive oil and balsamic vinegar for dipping.
How long does it take to bake this artisan bread?
The whole process takes a few hours because of the rise time. But mixing the ingredients only takes about five minutes.
I’m a beginner baker. Will I be able to make this artisan bread?
Definitely! This recipe is easy for beginners. It lets you make delicious homemade bread without needing to be a pro.
Crazy Easy 4 Ingredient Artisan Bread – It’s Always Autumn
Ingredients
- 3 cups all-purpose flour
- 1½ cups warm water
- ½ teaspoon active dry yeast
- 1 teaspoon salt
Instructions
- In a medium bowl, stir together all four ingredients until a shaggy dough forms.
- Cover the bowl with plastic wrap and let it rest at room temperature for 8 to 24 hours.
- After resting, the dough will be bubbly and sticky.
- Generously flour a work surface and gently turn the dough out onto it.
- With floured hands, shape the dough into a ball by folding the edges toward the center.
- Place the dough onto a piece of parchment paper and let it rest while the oven preheats.
- Preheat the oven to 450°F (232°C). If using a Dutch oven, place it in the oven to preheat as well.
- Once preheated, carefully transfer the dough (with parchment paper) into the Dutch oven.
- Cover and bake for 30 minutes.
- Remove the lid and bake for an additional 15 to 20 minutes, or until the crust is golden brown.
- Remove the bread from the oven and let it cool on a wire rack before slicing.