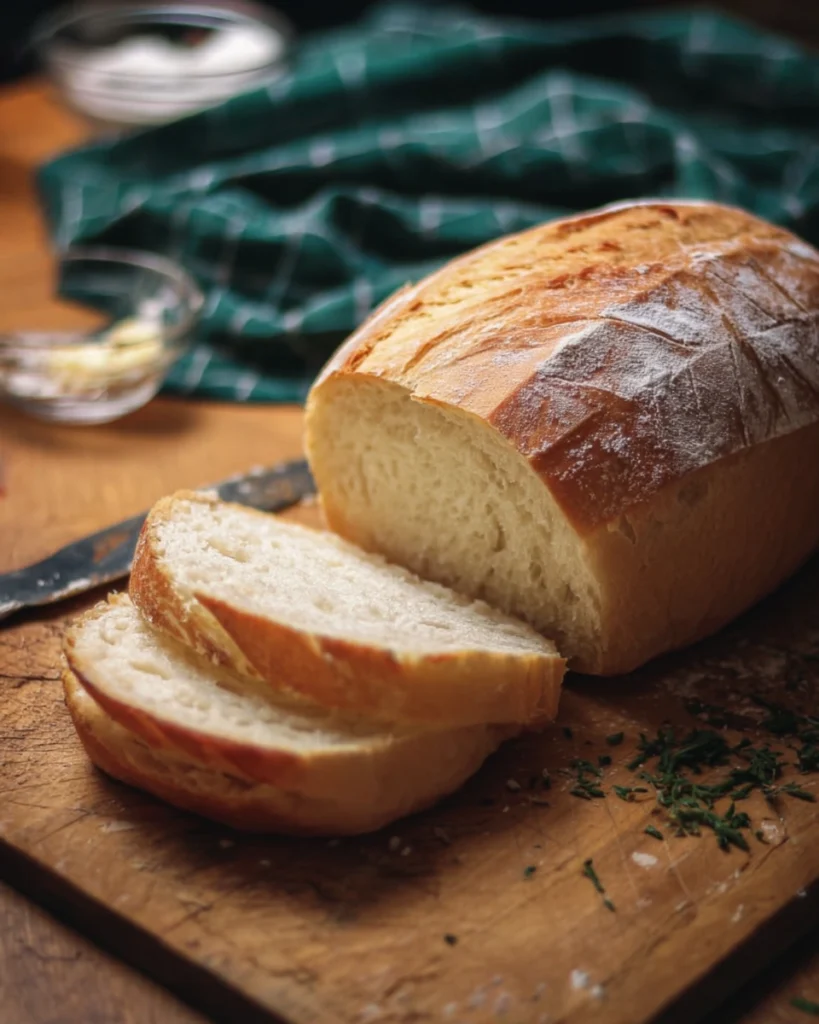
Imagine the comforting aroma of freshly baked bread filling your home. It’s like a warm hug for you. You don’t need an oven or hours to make this happen. Just a stovetop and simple ingredients are enough.
Stovetop bread is great for when you want homemade goodness fast. It’s not just about filling your belly. It’s about making memories with family or friends. In no time, you can make a soft, fluffy bread that tastes amazing.
Key Takeaways
- No need for an oven; stovetop bread is simple to make.
- Bring a homemade aroma to your kitchen quickly.
- This easy bread recipe requires just a few core ingredients.
- Perfect for a variety of meals and occasions.
- Emphasizes convenience and comfort in cooking.
Introduction to Stovetop Bread
Stovetop bread is a fun way to make homemade bread without an oven. It’s great for those who want a simple baking process but love fresh bread. It’s perfect for busy people and families because it’s so easy to make.
Just a few ingredients and a short prep time make homemade bread easy for all. Imagine pulling out warm, fluffy bread from your stovetop. It’s perfect for any meal or snack. This method also makes your kitchen cozy, making it a favorite for home cooks.

What Is No-Oven Stovetop Bread?
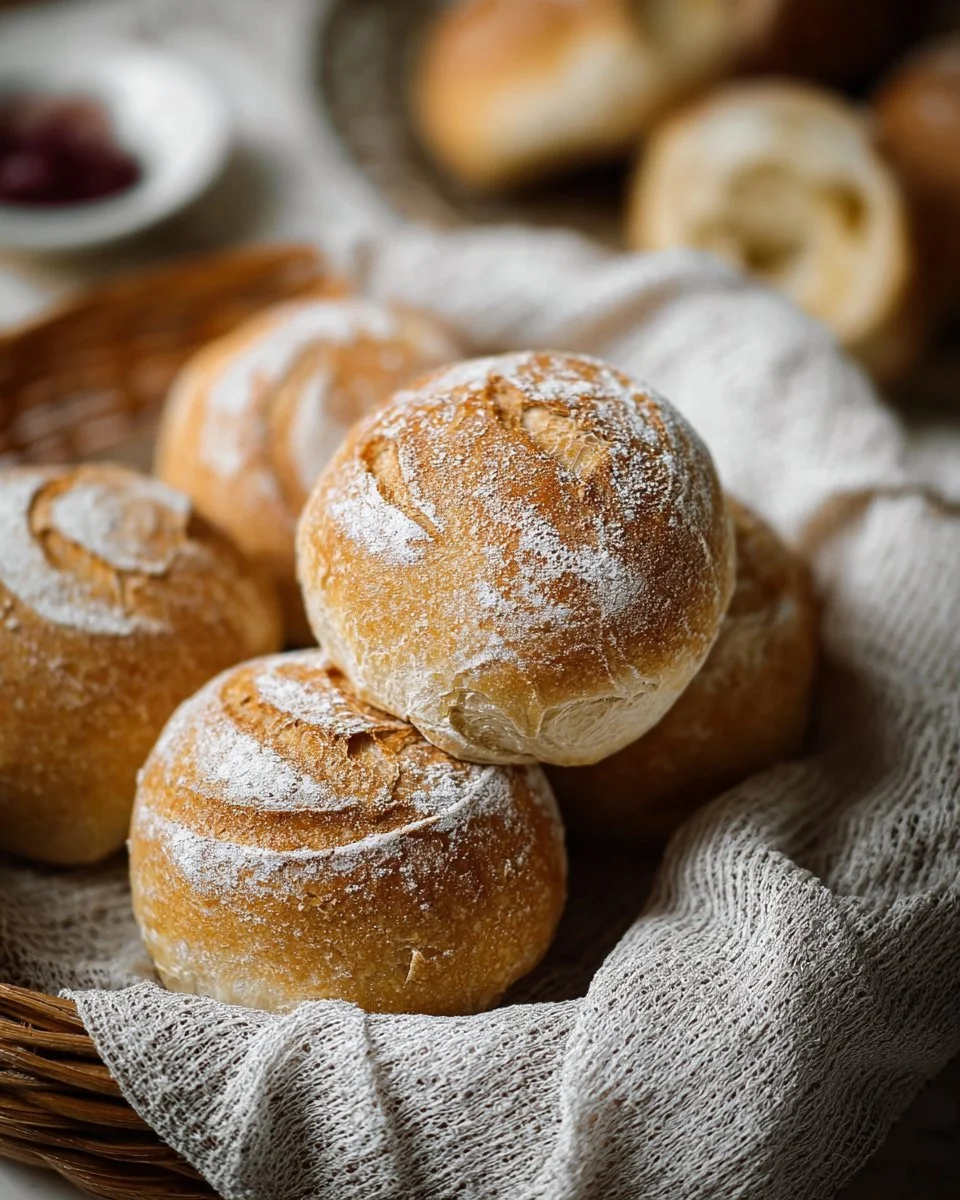
No-oven stovetop bread is a simple way to make homemade bread without an oven. It’s great for those without an oven or who want to save time. You mix basic ingredients and cook the dough in a pan. This makes a soft, fluffy loaf that’s as good as oven-baked bread.
This bread is easy to make and doesn’t require advanced baking skills. You can try different flavors and variations. It’s a convenient way to make delicious bread right on your stovetop.

Why You’ll Love No-Oven Stovetop Bread
This no-oven stovetop bread is perfect for any meal. It’s great for breakfast, lunch, or dinner. It makes your meals better, whether it’s with soups, stews, or just butter and jam.
Versatile for Any Meal
This bread is great for any occasion. It’s perfect for gatherings or quiet meals at home. You can try different flavors and toppings for a fun cooking experience.
Budget-Friendly Option
This bread is a smart choice for saving money. You don’t need to spend a lot on fancy loaves. It’s made with common ingredients, so you can always have fresh bread ready.
Quick and Easy to Make
This bread is quick to make, ready in under an hour. It’s easy to make, so you don’t have to wait long. It’s perfect for those who want fresh bread without the hassle.
Key Ingredients for Stovetop Bread
To make delicious no-yeast bread, focus on a few key ingredients. They work together to give your bread that perfect fluffy texture. Each ingredient is important for a tasty and satisfying stovetop creation.
All-Purpose Flour
All-purpose flour is the base of your bread. It’s versatile, making your bread soft and fluffy. This flour gives your loaf the right structure and keeps it light and airy.
Baking Powder
Baking powder is a leavening agent in no-yeast bread. It helps your bread rise, giving it an airy texture. This makes baking quick and easy, without needing traditional yeast.
Butter and Milk
Butter adds a rich flavor and a slightly flaky texture to your bread. It makes the taste better. Milk adds moisture, making the dough soft. Together, they create a delicious milk bread you’ll enjoy.
Step-by-Step Instructions to Make Stovetop Bread
Making delicious stovetop bread is easy with these simple steps. First, prepare your ingredients to make the process smoother. We’ll cover three key parts:
Mixing the Dry Ingredients
Start by whisking together the dry ingredients in a large bowl. Mix all-purpose flour, baking powder, and salt well. This ensures the right texture in your bread.
Add the Wet Ingredients
Now, add the wet ingredients. Pour in melted butter, olive oil, and milk. Mix them with the dry ingredients until a soft dough forms. The dough should be slightly sticky, which is okay.
Cooking on the Stovetop
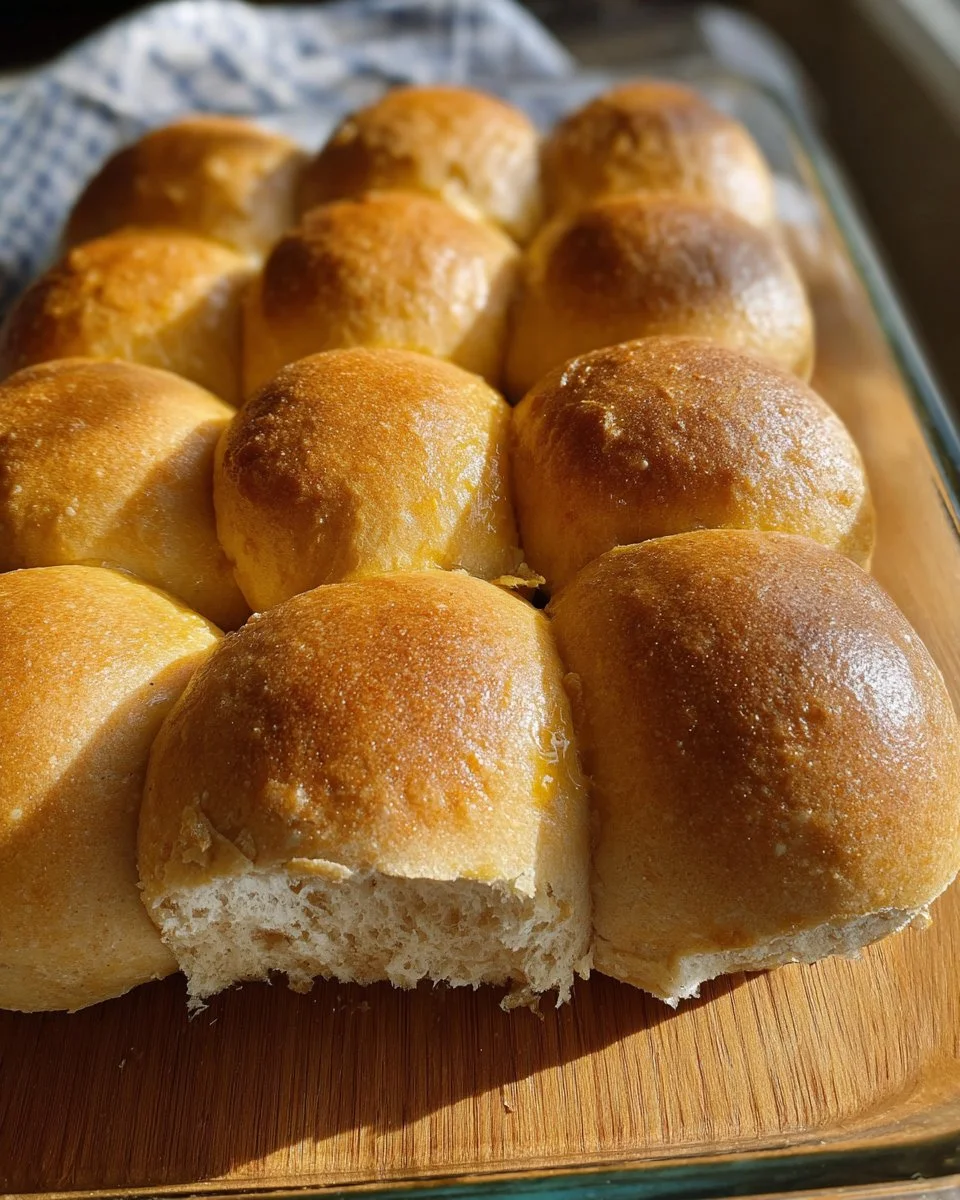
For stovetop cooking, heat a large, heavy-bottomed pan over medium heat. Shape the dough into a round loaf and place it in the pan. Cover and cook for about 25-30 minutes, flipping halfway. To check if it’s done, tap the bottom of the bread. If it sounds hollow, it’s ready.
| Step | Description |
|---|---|
| 1 | Mix dry ingredients: flour, baking powder, and salt in a large bowl. |
| 2 | Add wet ingredients: melted butter, olive oil, and milk. |
| 3 | Cook on stovetop: heat pan, shape dough, cover, and cook for 25-30 minutes. |
| 4 | Check doneness: tap bottom; hollow sound means ready! |
Variations and Customizations
Customizing your stovetop bread can add exciting flavors to your meals. You can choose savory or sweet options. Adding herbs and cheeses or sweet ingredients can make your bread unique.
Herbs and Cheese Additions
For a tasty herbed bread, mix in dried or fresh herbs like rosemary, thyme, or oregano. Grated cheese, such as cheddar or mozzarella, can turn your bread into a cheesy delight. This is great for serving with meals and impressing guests.
Sweet and Savory Options
For a sweet twist, add sugar, honey, or spices like cinnamon to your dough. If you like savory, try spices, garlic powder, or fillings like sun-dried tomatoes or olives. These changes can make your bread more flavorful and appealing to everyone.
How to Serve No-Oven Stovetop Bread
No-oven stovetop bread is perfect for many meals. Its soft texture adds to your dining pleasure. It’s great with lunch or dinner, and here are some tasty ways to serve it.
Pairing with Soups and Stews
Serving bread with soup is a classic. Try dipping it in stews or soups for a fulfilling meal. The bread soaks up flavors, making it perfect with your favorite bread and soup pairings.
With Butter and Jam
Butter and jam on warm bread make a great breakfast or snack. This simple combo adds sweetness and creaminess to your day. Bread with jam brightens mornings and offers comfort any time.
As a Side Dish or Appetizer
Stovetop bread is also great as an appetizer bread or side dish. It goes well with grilled meats, salads, or on charcuterie boards. Its versatility makes it perfect for any meal, from casual to formal.
Discover the many ways to enjoy stovetop bread. It makes meals better and adds comfort to your dining.
Storage and Reheating Tips
Keeping your no-oven stovetop bread fresh is key. You need to pay attention to how you store and reheat it. Using the right methods keeps your bread fresh and tasty for longer.
How to Store Leftover Bread
Store leftover bread in an airtight container at room temperature for up to two days. If you want to keep it longer, refrigerate or freeze it. Make sure to wrap it well to avoid freezer burn.
Following these tips will let you enjoy your bread even days after baking. For more storage advice, check out this guide.
Reheating Techniques for Best Results
There are several ways to reheat bread. One good method is to place slices in a pan for a few minutes. This keeps the crust crispy while keeping the inside soft.
Another option is to use the microwave on low power. This makes the bread softer but not crispy. Pick the method that gives you the perfect reheated slice.
Common Mistakes to Avoid
Making no-oven stovetop bread can be fun, but some mistakes can ruin it. Knowing these mistakes helps make a perfect bread. Here are a couple of key areas to watch out for.
Over-Kneading the Dough
One big mistake is over-kneading the dough. Too much kneading makes the bread tough, not soft. You want to knead just enough to make the dough smooth and elastic. This way, your bread will be light and fluffy.
Incorrect Heat Settings
Getting the heat right is also important. Too high heat can burn the bread and leave it raw inside. Use a medium heat for even cooking. Keep an eye on your bread to make sure it’s done right.
Health Benefits of Stovetop Bread
Making your own stovetop bread opens up a world of health benefits. You get to choose what goes into your bread. This means you can make a loaf that’s full of healthy bread and nutrients.
Another big plus is avoiding preservatives and additives found in many commercial breads. These ingredients are often used to extend shelf life but can harm your health. By baking at home, you can avoid these and enjoy a healthier diet.
Homemade stovetop bread also helps you live a balanced life. You can add whole grain flours, seeds, or other healthy ingredients to your recipe. This lets you make meals that fit your dietary needs and preferences, boosting your overall health.
| Health Aspect | Store-Bought Bread | Homemade Stovetop Bread |
|---|---|---|
| Preservatives | Often included | No preservatives |
| Control of Ingredients | Limited control | Full control |
| Nutritional Value | Varies greatly | Customizable |
| Freshness | May be stale | Always fresh |
In short, adding stovetop bread to your meals can greatly improve your health. You have control over what goes into it and can make it fresher. This leads to a healthier lifestyle for you and your family.
Perfecting Your Baking Technique
Mastering stovetop bread takes focus on several key factors. Using the right baking techniques can make a big difference. Watch your cooking times closely. Every stove is different, so you might need to try a few times to find what works for you.
The dough’s consistency is also very important. It should be just right, not too dry or too wet. Keeping a baking journal can help you track your progress. Note the time, temperature, and dough texture each time you bake.
Creating a routine can improve your baking skills. By baking regularly, you’ll start to notice patterns. This dedication will help you make bread that wows everyone.
Once you feel more confident, try new flavors and textures. Experiment with different flours or add-ins to find new favorites. Happy baking!
Additional Tips for Delicious Stovetop Bread
Making stovetop bread is a fun experience that lets you get creative. You can add things like olive oil, herbs, nuts, or dried fruits to make it taste better. These extras make your bread richer and more enjoyable.
Knowing how your stovetop cooks is key. Adjust cooking times based on your loaf’s thickness for the best results. Every stovetop is different, so you might need to adjust the heat. Paying attention to how your bread cooks helps you get better at making it.
- Let your dough rest a bit before shaping for better texture.
- Brush the top with butter or oil for a golden crust.
- Try adding spices like garlic powder or cinnamon for a unique flavor.
Following these tips will help you make even better stovetop bread. You’ll enjoy every delicious bite.
Conclusion
Stovetop bread is a great way to make homemade goodness without an oven. This recipe makes cooking easier and lets you create a soft, fluffy bread. It’s perfect for any meal, whether it’s with savory dishes or sweet spreads.
Making this bread is also a fun way to get creative in the kitchen. With simple ingredients, you can make a tasty bread that’s as good as oven-baked. It’s easy to follow, making it perfect for both experienced cooks and beginners.
Want to explore more about stovetop bread? Check out the full recipe here. You’ll love the aroma and taste of fresh bread, adding warmth and comfort to your meals.
FAQ
What exactly is stovetop bread?
Stovetop bread is a quick bread you can make without an oven. It’s cooked in a pan on the stovetop. This makes it easy for anyone to make, no matter their baking skills.
How long does it take to make stovetop bread?
Making stovetop bread takes less than an hour. It’s fast and easy, perfect for those who don’t have a lot of time.
Can I customize my stovetop bread?
Yes! You can add herbs, garlic powder, cheese, sugar, honey, or spices to the dough. This lets you make it taste just how you like it, whether you prefer it savory or sweet.
How do I store any leftover stovetop bread?
Keep leftover stovetop bread in an airtight container at room temperature for up to 2 days. For longer storage, refrigerate or freeze it, making sure it’s well-wrapped to prevent freezer burn.
What are some common mistakes to avoid when making stovetop bread?
Avoid over-kneading the dough, as it can make the bread tough. Also, make sure the heat is right to prevent burning the outside or undercooking the inside.
Is stovetop bread healthier than store-bought options?
Yes, homemade stovetop bread lets you choose better ingredients without preservatives or additives. This can make it a healthier option for your family.
What ingredients do I need for stovetop bread?
You’ll need all-purpose flour, baking powder, butter, and milk. These ingredients help make the bread soft and fluffy.
Can I use other types of flour for stovetop bread?
While all-purpose flour is best, you can try other flours like whole wheat or gluten-free. Just remember, it might change the bread’s texture and taste.
How do I reheat leftover stovetop bread?
To reheat, warm slices in a pan over low heat for a few minutes. Or, use the microwave on low power to make it softer.
No-Oven Stovetop Bread
Ingredients
Dry Ingredients
- 2 cups all-purpose flour Base ingredient for the bread.
- 1 tbsp baking powder Leavening agent for a fluffy texture.
- ½ tsp salt Enhances flavor.
Wet Ingredients
- 3 tbsp butter, melted Adds richness to the bread.
- 1 cup milk Provides moisture.
- 1 tbsp olive oil Optional, for added flavor.
Instructions
Preparation
- In a large bowl, whisk together the dry ingredients: all-purpose flour, baking powder, and salt.
- Add the melted butter, olive oil, and milk to the dry mixture. Stir until a soft, slightly sticky dough forms.
Cooking
- Heat a large, heavy-bottomed pan over medium heat.
- Shape the dough into a round loaf and place it in the pan.
- Cover the pan and cook for about 25-30 minutes, flipping halfway through.
- The bread is done when it sounds hollow when tapped on the bottom.