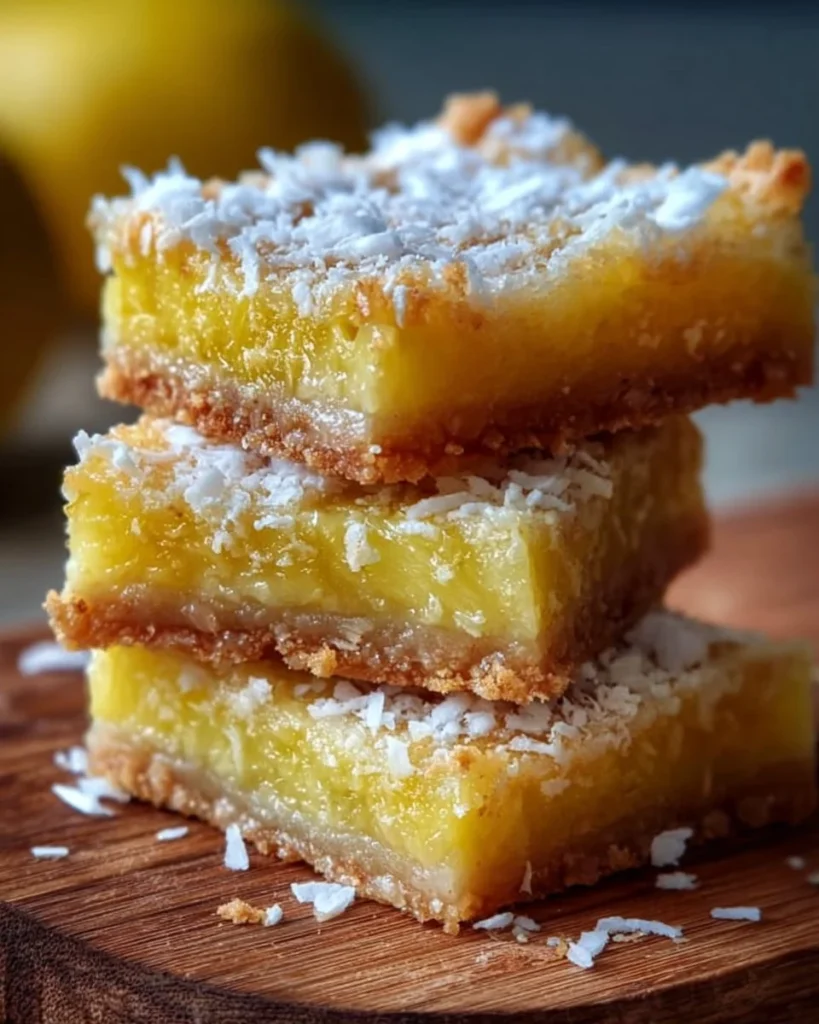
Pineapple Bliss Bars are a delightful treat that brings the tropical flavors of pineapple straight to your kitchen. These bars are not only easy to make but also offer a perfect balance of sweetness and tartness. With a buttery crust topped with a creamy pineapple filling, every bite is sure to lift your spirits.
Why Make This Recipe
You should make Pineapple Bliss Bars because they are simple to prepare and require minimal ingredients. They are perfect for family gatherings, potlucks, or just a weekend treat. The combination of pineapple and coconut gives them a refreshing taste, making them a great dessert option for warm days. Plus, they are a delicious way to use fresh or canned pineapple.
How to Make Pineapple Bliss Bars
Making Pineapple Bliss Bars is straightforward and fun. Follow these simple steps to enjoy a lovely tropical dessert.
Ingredients
- 2 cups all-purpose flour
- 1/2 cup unsalted butter, softened
- 1/2 cup granulated sugar
- 1/4 teaspoon salt
- 1 cup crushed pineapple, drained
- 1 cup sweetened shredded coconut
- 1/2 cup powdered sugar
- 1 tablespoon lemon juice
Directions
- Preheat the oven to 350°F (175°C) and grease a baking dish.
- In a bowl, mix the flour, softened butter, granulated sugar, and salt until combined.
- Press the mixture into the bottom of the prepared baking dish to form the crust.
- Bake for 15 minutes or until lightly golden.
- In another bowl, combine the crushed pineapple, shredded coconut, powdered sugar, and lemon juice.
- Spread the pineapple mixture evenly over the baked crust.
- Bake again for 20-25 minutes until the top is set and lightly browned.
- Allow to cool, cut into bars, and enjoy.
How to Serve Pineapple Bliss Bars
Serve Pineapple Bliss Bars at room temperature or chilled for a refreshing treat. They are excellent on their own, or you can pair them with a scoop of vanilla ice cream or whipped cream for extra delight.
How to Store Pineapple Bliss Bars
To store Pineapple Bliss Bars, keep them in an airtight container in the refrigerator. They will stay fresh for up to a week. You can also freeze them for longer storage; just make sure to wrap them well.
Tips to Make Pineapple Bliss Bars
- Make sure to drain the crushed pineapple well to avoid a soggy base.
- Feel free to taste the pineapple mixture before spreading it onto the crust to adjust sweetness as desired.
- If you like a bit of extra texture, add chopped nuts to the pineapple filling.
Variation
You can add different flavors by mixing in some chopped nuts or using different fruits like mango or peaches. For a bit of extra zest, consider adding some lime juice or zest to the filling.
FAQs
1. Can I use fresh pineapple instead of canned?
Yes, you can use fresh pineapple. Just make sure to crush and drain it well before using.
2. How can I make these bars gluten-free?
You can substitute the all-purpose flour with a gluten-free flour blend.
3. Can I make these bars ahead of time?
Absolutely! You can prepare them a day or two in advance. Just store them in the refrigerator until ready to serve.
Enjoy your Pineapple Bliss Bars with family and friends and let the tropical flavors transport you to a sunny paradise!
Pineapple Bliss Bars
Ingredients
For the crust
- 2 cups all-purpose flour
- ½ cup unsalted butter, softened Make sure it’s at room temperature.
- ½ cup granulated sugar
- ¼ teaspoon salt
For the filling
- 1 cup crushed pineapple, drained Well-drained to avoid a soggy base.
- 1 cup sweetened shredded coconut
- ½ cup powdered sugar
- 1 tablespoon lemon juice
Instructions
Preparation
- Preheat the oven to 350°F (175°C) and grease a baking dish.
- In a bowl, mix the flour, softened butter, granulated sugar, and salt until combined.
- Press the mixture into the bottom of the prepared baking dish to form the crust.
- Bake for 15 minutes or until lightly golden.
Filling
- In another bowl, combine the crushed pineapple, shredded coconut, powdered sugar, and lemon juice.
- Spread the pineapple mixture evenly over the baked crust.
- Bake again for 20-25 minutes until the top is set and lightly browned.
Serving
- Allow to cool, cut into bars, and enjoy.