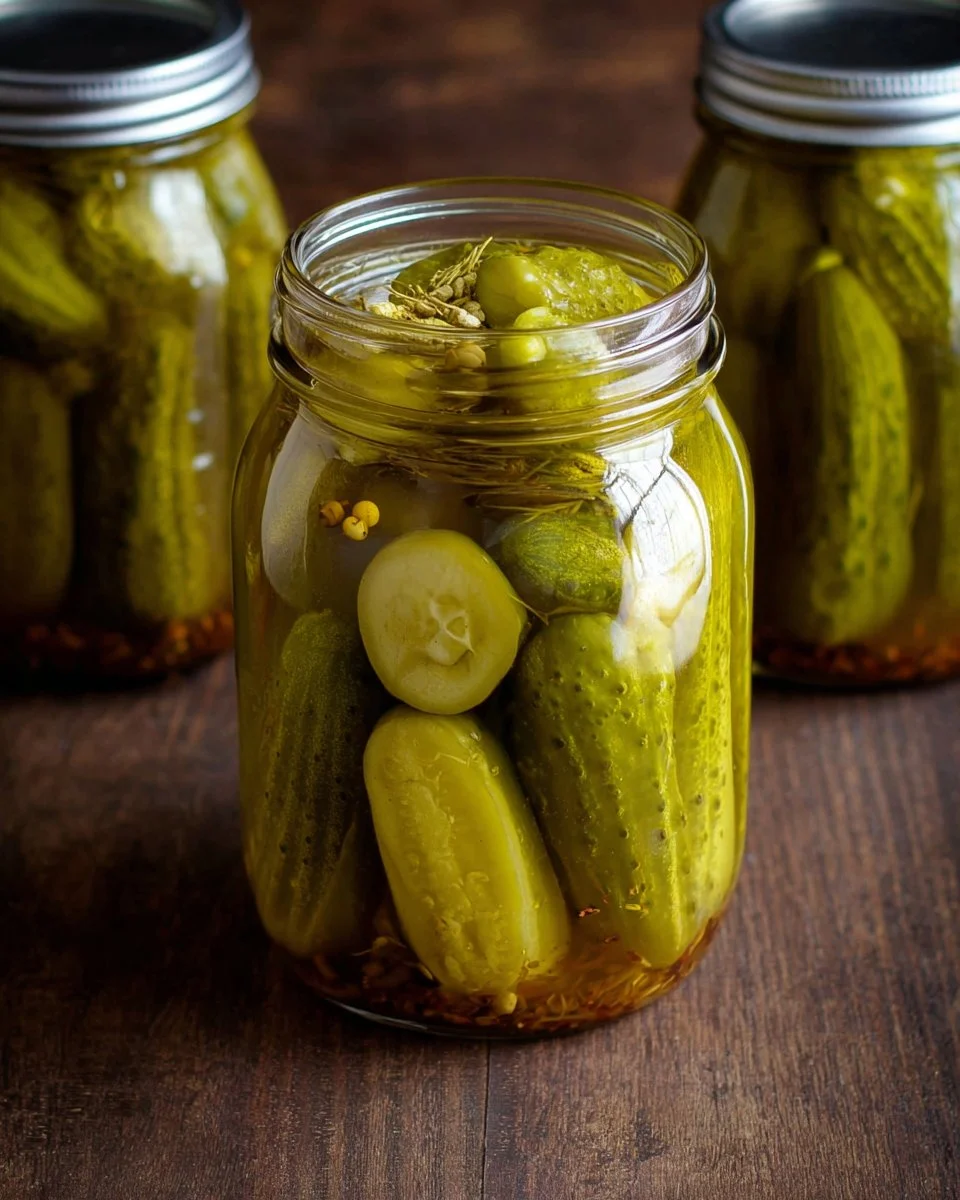
Making homemade dill pickles is not only easy, but it also allows you to enjoy fresh, crunchy pickles right from your kitchen. There’s something special about creating your own preserves. You can customize the flavor to suit your taste, making them more garlicky or spicier if you prefer. Plus, homemade pickles can save you money compared to store-bought options. It’s a fun project that can be shared with family and friends.
how to make Easy Homemade Dill Pickles
Ingredients:
- 12 pounds cucumbers* (approximately), well rinsed with ends trimmed
- 1/2 tablespoon peppercorns (5 per jar)
- 16 garlic cloves (2 per jar)
- Fresh dill, 2-3 twigs per jar
- 12 cups (3,000 ml) water (cold or lukewarm)
- 2 cups (500ml) distilled white vinegar (5% or 6% acidity)
- 2/3 cup (200g) fine salt
- 1/2 cup +1 tablespoon (115g) granulated sugar
- 5 bay leaves
Directions:
- Sterilize Jars: Wash all jars and lids with warm soapy water. Sterilize the lids by fully submerging them in boiling water for 4-5 minutes. Carefully pat dry with a paper towel. Preheat the oven to 215°F (100°C) and place jars upside down on the oven racks to dry for 20 minutes or until completely dry.
- Make Pickling Brine: In a large pot, mix together 12 cups of water, 2 cups of vinegar, 1/2 cup of sugar, and 2/3 cup of salt. Toss in the 5 bay leaves. Bring this mixture to a boil, then reduce the heat and let it simmer for 5 minutes. Remove from heat and let it rest for 10 minutes before discarding the bay leaves.
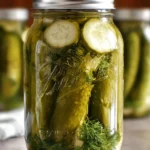
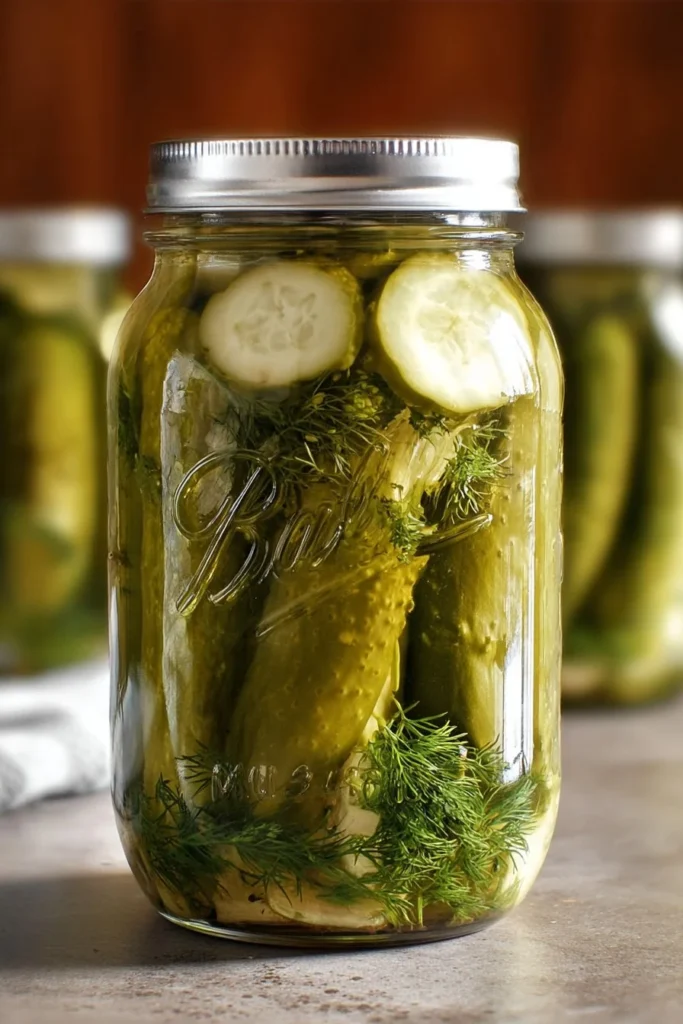
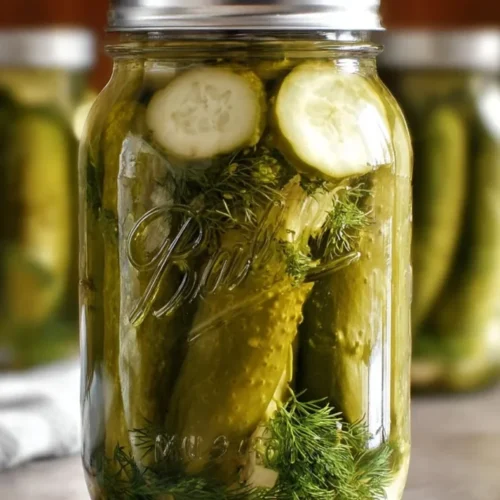
- Fill Jars: Cut off both ends of the cucumbers and wash them thoroughly. Add a couple of fresh dill twigs, garlic cloves, and black peppercorns at the bottom of each jar. Tightly pack the jars with the cucumbers. Slowly pour the pickling brine into the jars over the cucumbers, leaving about 1/2 inch of space at the top. Cover with the lids but do not completely seal yet.
- Process the Jars: If not using a canning rack, place a kitchen towel at the bottom of the pot to prevent the jars from touching directly. Place the filled jars into the canning pot and fill with warm water, about 2 inches below the top of the jars. Cover with a lid, bring to a boil over medium-high heat, then reduce the heat to low and process for about 15 minutes or until the cucumbers turn light green.
- Seal the Jars: Carefully remove each jar using a jar lifter. Tighten the lids and then flip the jars upside down. Cover them with towels or blankets for insulation. Leave them undisturbed at room temperature for 12 to 24 hours. You may hear a pop when the jars seal. Store the pickles in a cool place.
how to serve Easy Homemade Dill Pickles
These dill pickles are the perfect crunchy addition to sandwiches and burgers. You can also serve them as a side snack, or chop them finely and add them to potato salad or coleslaw for an extra kick. Enjoy them at picnics, barbecues, or simply by themselves straight from the jar!
how to store Easy Homemade Dill Pickles
Keep your homemade dill pickles in a cool, dark place. Once opened, store them in the refrigerator where they’ll stay crispy and flavorful for several weeks. Make sure the lids are tightly sealed after each use.
tips to make Easy Homemade Dill Pickles
- Choose fresh, firm cucumbers for the best results.
- Adjust the amount of garlic and dill to suit your taste preference.
- Make sure the brine fully covers the cucumbers for proper pickling.
- If you like heat, add some sliced jalapeños or red pepper flakes to the jars.
variation
Feel free to experiment with other spices like mustard seeds or coriander for different flavors. You can even use other types of vinegar like apple cider vinegar for a unique twist!
FAQs
1. How long do homemade dill pickles last?
Homemade dill pickles can last up to one year if unopened and stored in a cool, dark place. Once opened, keep them in the refrigerator and use within a few weeks.
2. Can I use non-cucumbers for this recipe?
Yes! You can try pickling other vegetables like carrots, radishes, or green beans following the same process.
3. Do I need to process the jars in a water bath?
Yes, processing the jars helps ensure they seal properly and keeps your pickles safe for long-term storage.
Easy Homemade Dill Pickles
Ingredients
Pickling Ingredients
- 12 pounds cucumbers well rinsed with ends trimmed
- ½ tablespoon peppercorns (5 per jar)
- 16 cloves garlic (2 per jar)
- 2-3 twigs fresh dill (per jar)
- 12 cups water (cold or lukewarm)
- 2 cups distilled white vinegar (5% or 6% acidity)
- ⅔ cup fine salt
- ½ cup granulated sugar (plus 1 tablespoon, 115g total)
- 5 leaves bay leaves
Instructions
Sterilizing Jars
- Wash all jars and lids with warm soapy water.
- Sterilize the lids by fully submerging them in boiling water for 4-5 minutes and then pat dry.
- Preheat the oven to 215°F (100°C) and place jars upside down on the oven racks to dry for 20 minutes or until completely dry.
Making Pickling Brine
- In a large pot, mix together 12 cups of water, 2 cups of vinegar, 1/2 cup of sugar, and 2/3 cup of salt.
- Add the 5 bay leaves, bring to a boil, then reduce heat and let simmer for 5 minutes.
- Remove from heat and let it rest for 10 minutes before discarding the bay leaves.
Filling Jars
- Cut off both ends of the cucumbers and wash them thoroughly.
- In each jar, add a couple of fresh dill twigs, garlic cloves, and black peppercorns at the bottom.
- Tightly pack the jars with the cucumbers and pour the pickling brine over them, leaving about 1/2 inch space at the top.
- Cover with lids but do not completely seal yet.
Processing Jars
- Place a kitchen towel at the bottom of the pot to prevent jars from touching directly.
- Place the filled jars into the canning pot and fill with warm water, about 2 inches below the top of the jars.
- Cover with lid, bring to a boil over medium-high heat, then reduce heat to low and process for about 15 minutes.
- Remove jars using a jar lifter and tighten lids, then flip jars upside down and insulate with towels.
- Leave undisturbed at room temperature for 12 to 24 hours.
Storing Jars
- Store the pickles in a cool place.